The installation guide describes in short steps to assemble the appliance and explains how to open the NetXGATE Admin Dashboard. The Admin Dashboard then further allows you to configure every aspect of the security and gateway system.
NetXGATE UTM is Shipped with Following Default Values.
Username: admin
Password: admin99
LAN Interface: 192.168.100.1
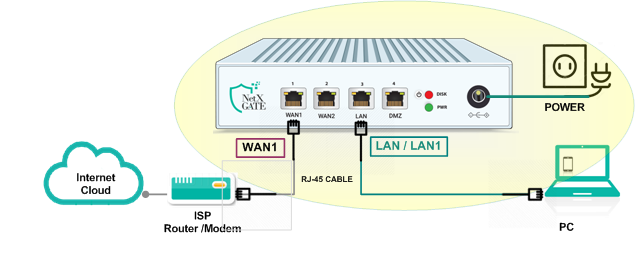
Interface: LAN / LAN1
I- NetXGATE UTM box is a multi-Interface /Port network Security Appliance.
II- LAN / LAN 1 : is pre-Configured for LAN which has factory default IP 192.168.100.1.
III- WAN1 : is pre-Configured for WAN which has factory default-DHCP Mode.
IV- Other ports can be used or configured for DMZ or WAN 2 / WAN 3 or LAN 2 Interface etc.
Step-1: Unpack the box, connect the appliance to the power supply via adapter/power cable and turn it on.
Step-2: Plugin the one end of RJ-45 Ethernet cable in LAN or LAN1 interface and another end with your Laptop / PC.
Step-3 You will need to configure a work station with the necessary LAN settings to access Web UI. You can change these settings later to match your existing network.
Connect the other end of RJ-45 cable in Admin PC. Go to Network & Sharing Center (in Windows PC) or Network Connections/Manager (in Linux PC) and set the DHCP Mode or Assign Static IP as 192.168.100.2 and subnet mask 255.255.255.0 and default gateway 192.168.100.1.
Step-4: Open the browser and hit-192.168.100.1.
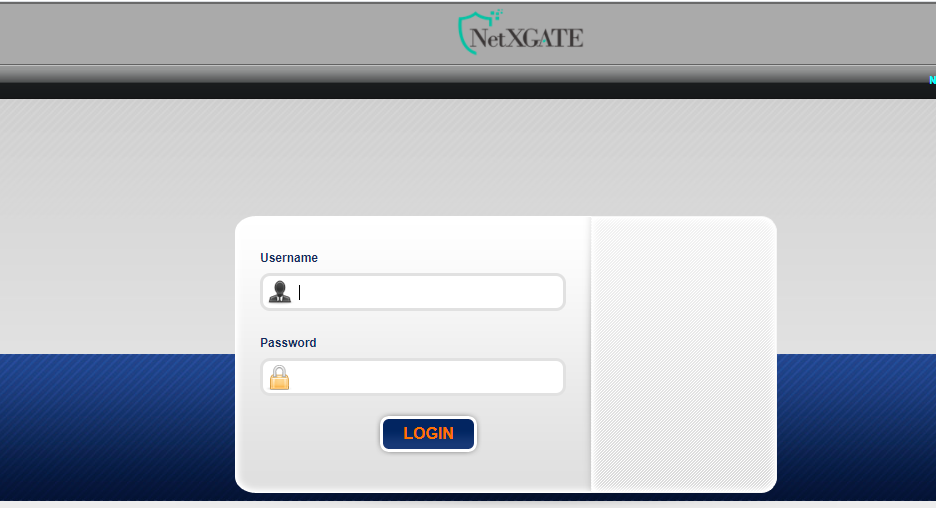
Step-5: At the Login page,. Enter default Username as admin and Password as admin99 and Click to LOGIN. The Home page is displayed.
Congratulation ! You can now configure your device.