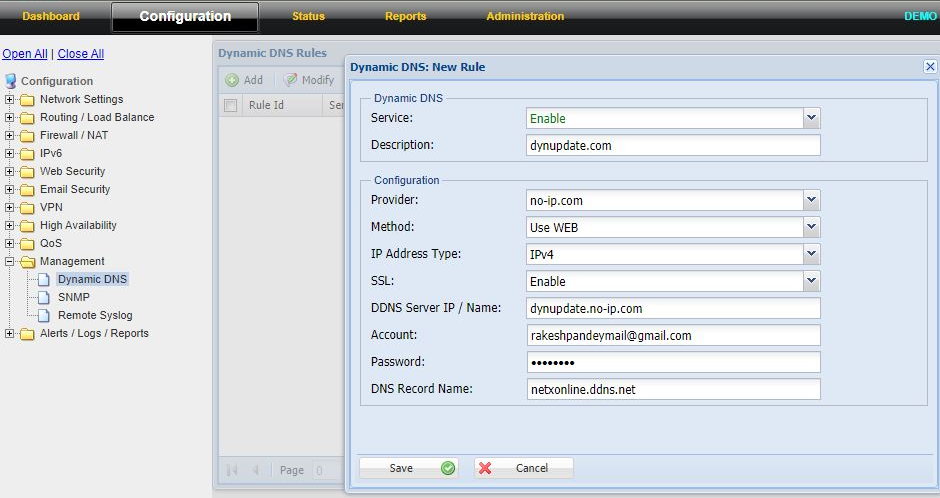
Currently, we support the following third-party DDNS providers as well as Custom DDNS:
Below steps shall be followed to configure Dynamic DNS in NetXGATE Firewall.
Steps to be followed:
1: Login to NetXGATE NG Firewall.
2: Go to Configuration , then Management , and navigate to Dynamic DNS option .
3: Click the + (Add) select service as Enable .
4: Under Description - Enter a description related to the server being configured for your reference.
5: In Configuration under Provider Select the Service provider name. e.g:No-IP.COM
6: Under IP Address Type , Select IPv4 or IPv6 . Defualt- IPv4.
7: Select Method for which interface DYDNS needs to access. Defualt- Use WEB
8: Under DDNS Server Name / IP mention the server name of the DDNS provider .e.g.dynupdate.no-ip.com
9: Provide the account information by which you registered your ddns service and Dynmic DNS Name .
10: Custome URL Option only apply if you have your own custom dynamic DNS server or provided by netxgate team .
After making the above necessary configuration, Click Save and Restart Service.
